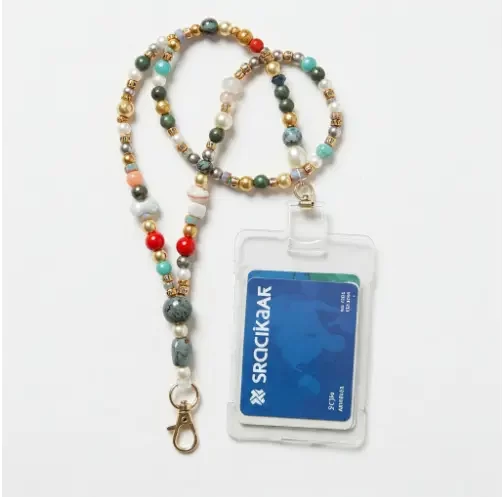
Beaded lanyards offer a great way of keeping ID badges or keys nearer to oneself in a fun and colorful way. Whether you want to come up with a unique accessory to sport at work or give as a gift to a friend, a beaded lanyard is a simple and quite fun thing.
If you don’t want to make it yourself, a custom ID badge holder manufacturer can help you in this regard. In this blog, we will detail the steps you need to follow in order to make one of these beautiful beaded lanyards yourself.
What You Will Need
Before we can start learning how to make a beaded lanyard, let us gather everything we will need here:
- Beads: They can be of all kinds: different colors, different shapes, and different materials that are popular are glass, wooden or acrylic beads.
- Cord or string: This will hold your beads together. You can use a nylon cord, elastic string or even a sturdy thread.
- Scissors: For cutting the cord into proper lengths.
- Crimp beads: These small metal tubes help in fixing the ends of your cord.
- Lanyard clip: A clip will hold onto your ID badge or keys.
- Optional: You can add a bead mat which can help keep your beads organized, preventing rolling away.
Step 1: Determine the Length
The first step concerning making your beaded lanyard is to consider the length at which you would like it to hang. A lanyard would typically be 36 inches long (around 91 cm), but you can modify that according to personal preference.
For instance, in the case of wanting longer lanyards or double-layered ones, even more cord would be needed because it would not suffice. Next, for cutting, try to get a length just a little longer than your measure, around 10 percent longer. That way, you will have enough to work with.
Step 2: Plan the Design
Planning how your beaded lanyard is going to look is one of the most enjoyable parts of making a beaded lanyard. You can set up patterns with your beads or just go with a cacophony of colors and shapes. Some design ideas include:
- A fade: Start with one color and fade into another.
- Color blocking: Group beads together in bold sections all of one color.
- Mix and match: Use unexpected shapes and sizes for an interesting look.
Take a moment to lay out your beads on a flat surface to visualize how your design will work before stringing. This will aid in attaining balance and an appealing composition.
Step 3: Pop the Beads onto the Cord
Now that the design is prepared for stringing, commence stringing onto the cord.
How to String Beads:
- Secure One End: A tape or a bead stopper can be used to secure one end of the cord for easier stringing. This is to prevent beads from falling off during the stringing process.
- Starting Stringing: Begin to add beads to your cord according to the design. If your beads are large, ensure that they pass freely through the cord.
- Length Check: When you finish adding beads, hold the lanyard up and check if it is the appropriate length. If it hangs short, you may want to fit in another bead.
- Space Left: Leave some room at either end of the lanyard for securing purposes; around 2-3 inches or 5-7 cm will be enough.
Step 4: Secure the Beads
Good faith. Now it’s time to secure the beads in place once you’re happy with the length and design of your lanyard.
Using Crimp Beads:
- Add Crimp Bead: Thread a crimp bead on the end of the cord and then a lanyard clip.
- Loop the Cord: Pass the end of the cord back through the crimp bead; loop the cord around the clip.
- Crimp the Bead: Use flat-nose pliers to crimp tightly, thus securing the clip of the lanyard.
- Trim Excess Cord: Trim any excess cord after crimping, leaving a small tail to be hidden at an inconspicuous point in the lanyard ends.
- Repeat for the Other End: Repeat for the other side of the lanyard. You may wish to put another clip on the end or leave it open to attach an ID badge later.
Step 5: Add the Final Touches
With the lanyard complete, it’s time to add some final touches:
Test the Strength
Lightly tug at the ends of your lanyard to check if all elements are securely in place. If any beads feel loose, you may want to add on some more crimp beads or alter the cord length.
Decorate (Optional)
If you’d like to personalize it, hang on some charms or pendants somewhere on the lanyard. Depending on your design, you can hang them between the beads or at the very ends.
Step 6: Display Your Creation
You’ve now made your very own beaded lanyard. Now, wear it to work, school, or anywhere else that requires ID badges or keys. You can also give your handcrafted lanyard as an even more thoughtful gift for a friend or family member.
Care of Your Beaded Lanyard
Here are a few care tips to keep your lanyard looking good-beautiful:
Avoid Excess Moisture: Please do not wear your lanyard when raining or when swimming, as it might corrode the beads.
Store Properly: Hang the lanyard when you are not using it or store it flat in order not to bend or break the cord.
Final Thoughts
Making beaded lanyards is the simplest and most entertaining craft project where your talent can be displayed. In a few steps and with some materials, one can make an accessory that serves an important function and is different from most others.
Your beaded lanyard garden will become a talking point, whether it is for you or a gift. What are you waiting for? Collect your materials and start making your beaded lanyard today. For bulk lanyards, our custom lanyard cardholder supplier is available to assist with your requirements. Yudi Lanyard is the right place to get this stuff done.